

Fertilise a cool-season lawn twice a year — late spring and early fall — using a slow-release nitrogen source at a rate recommended by university extension guidance for most homeowners. That single rule, backed by University of Illinois Extension guidance, covers most Canadian homeowners. Before you open a bag, though, run through this checklist:
- Get a soil test to confirm whether phosphorus or potassium are actually needed
- Time it right — wait until grass is actively growing, not just greening up after snowmelt
- Choose slow-release nitrogen to avoid burn and reduce leaching
- Measure your lawn area in square feet or square metres before calculating product volume
- Calibrate your spreader against the bag’s settings before you start
- Water in after application unless rain is forecast within 24 hours
Yearlong has been helping Calgary homeowners get this right since 2017. The steps below explain each point in detail.
Key takeaways
Fertilising a cool-season lawn correctly comes down to three things: test the soil first, time the application to active growth rather than the calendar, and use slow-release nitrogen at roughly 1 lb per 1,000 sq ft per application.
| Point | Details |
|---|---|
| Test soil before buying | A soil test confirms whether P and K are needed; most established lawns need only nitrogen. |
| Time to active growth | Apply during periods of active growth for cool-season grasses, such as late spring and late summer to early fall, and avoid early spring and mid-summer applications. |
| Use slow-release nitrogen | Polymer- or sulfur-coated urea reduces burn, leaching, and boom-and-bust growth cycles. |
| Calibrate your spreader | Match the spreader setting to the bag, make perimeter passes first, and use a side-shield near hard surfaces. |
| Water in after application | About 6 mm of water activates granular fertiliser; avoid applying before heavy rain. |
Table of Contents
- What are the best tips for fertilizing your lawn by season?
- Why should you test your soil before fertilizing?
- How do you choose the right fertilizer for a Canadian lawn?
- How do you calculate how much fertilizer to apply?
- What aftercare does your lawn need after fertilizing?
- What fertilizer mistakes do homeowners most often make?
- How does compost topdressing fit into your fertilizing plan?
- Calgary-specific tips and when to call a pro
- How do Canadian climate zones change your fertilizer approach?
- How do grass varieties across Canada change your fertilizing schedule?
- What actually matters most when fertilizing a lawn
- Sources
What are the best tips for fertilizing your lawn by season?
The single most useful rule: cool-season grasses need their biggest feed in late summer or early fall, not in spring. Wisconsin Horticulture Extension is direct about this — heavy early-spring fertilisation pushes leaf growth at the expense of roots, leaving turf thin and stressed by July.
For most of Canada, cool-season grasses (Kentucky bluegrass, fescue, perennial ryegrass) dominate. Warm-season grasses like zoysiagrass are rare outside southern Ontario microclimates and need a completely different schedule — feed them once soil temperatures are consistently above 15°C, typically June through August.
Seasonal windows for cool-season lawns
- Late May to mid-June (light spring feed): Apply only after the lawn has been actively growing for two to three weeks. A light application — half the normal rate — supports recovery from winter without triggering the false green-up that redirects energy into leaves rather than roots.
- Late August to mid-September (primary fall feed): This is the most important application of the year. Grass uses nutrients now to build carbohydrate reserves and deepen roots before dormancy.
- Late October (optional winterizer): A low-nitrogen, higher-potassium application can improve winter hardiness, but only if your soil test shows potassium is low. Skip it if you already fed in September.
- Avoid mid-summer feeding for cool-season turf. Applying nitrogen during heat stress accelerates disease and burn.
Regional timing for Canadian climates
Calgary and the Prairies have a compressed spring. Soil temperatures often stay below 10°C until mid-May, so the late-May window is realistic — sometimes early June after a cold spring. Watch for a hard frost date in late September; your fall feed should go down at least three weeks before the ground freezes.
Interior BC and the Okanagan warm faster. A late-April light feed is often workable there. Atlantic provinces and southern Ontario sit between these two extremes — late April to early May for spring, and mid-August to early September for fall. Scheduling your lawn care around local frost dates rather than calendar months is the more reliable approach.
Statistic to know: Illinois Extension recommends splitting seasonal nitrogen into two to four applications rather than one heavy dose, with each application targeting roughly 1 lb of actual nitrogen per 1,000 sq ft.
Why should you test your soil before fertilizing?
A soil test is the single most important step most homeowners skip. UMN Extension puts it plainly: it is the only definitive way to know whether phosphorus or potassium are actually needed. Established lawns almost always need supplemental nitrogen — but adding phosphorus when the soil already has enough contributes to runoff pollution without improving your grass at all.
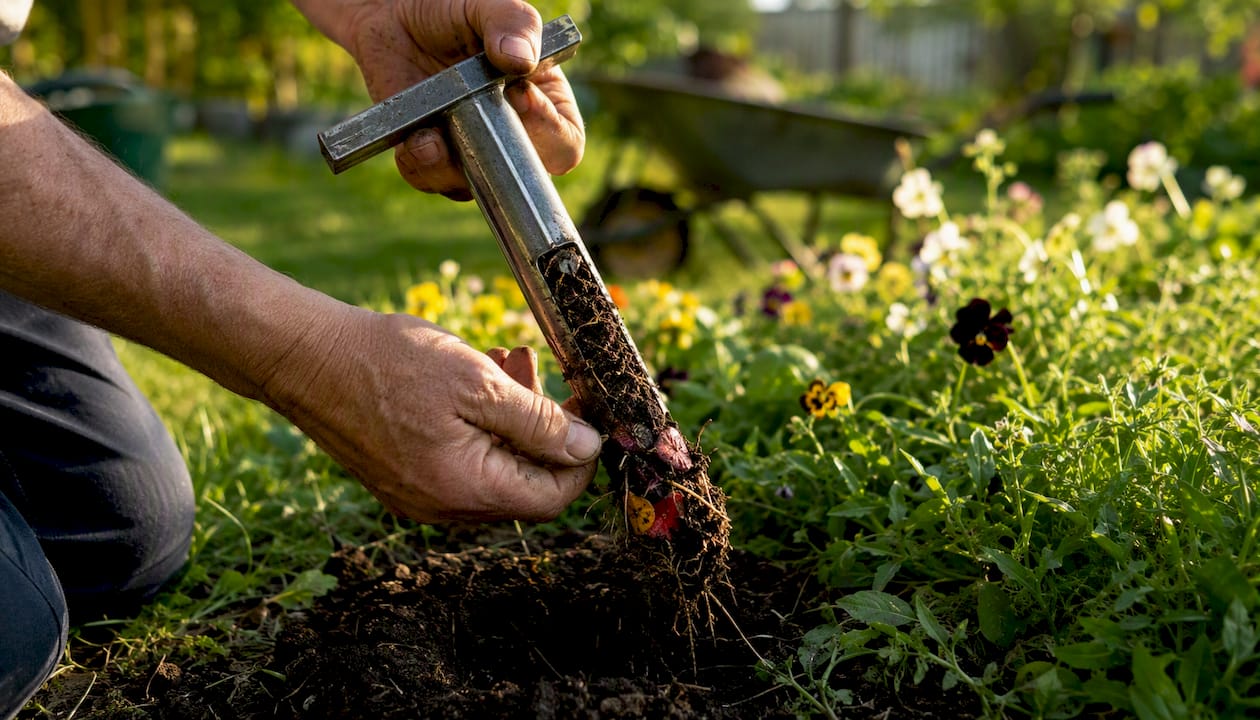
A standard test checks nitrogen availability, phosphorus, potassium, pH, and often organic matter content. The pH result matters more than most people expect: a pH below 6.0 locks up nutrients so grass cannot absorb them even when they are present.
How to collect and send a sample
- Use a clean trowel or soil probe — avoid galvanized metal, which can skew zinc readings.
- Take 10–15 cores from different spots across the lawn, each about 8 cm deep.
- Mix the cores in a clean plastic bucket and let them air-dry at room temperature.
- Fill the lab’s sample bag (roughly 250 g) and complete the submission form.
- Send to a certified lab. In Alberta, the Exova/Bureau Veritas lab in Edmonton and the University of Alberta Soil Testing Lab both accept residential samples. Agvise Laboratories in Northwood, ND, also serves Prairie homeowners and provides metric-friendly reports.
Home test kits from garden centres give a rough pH and NPK reading in minutes, but they lack the precision to guide phosphorus or lime decisions. Use them as a quick sanity check, not as a substitute for a lab report.
Pro Tip: When submitting your sample in Alberta, note on the form that the turf is established lawn, not a new seeding. Labs adjust their recommendations accordingly — a new lawn often needs starter phosphorus that an established one does not.
How do you choose the right fertilizer for a Canadian lawn?
Start with what your soil test says, then match the product to that result. For most established Canadian lawns, the answer is a nitrogen-only or nitrogen-dominant fertiliser. Phosphorus and potassium go in only when the test shows a deficiency.
Reading the N-P-K label
Every bag shows three numbers: nitrogen (N), phosphorus as P₂O₅ (P), and potassium as K₂O (K). A 30-0-6 product is 30% nitrogen, zero phosphorus, and 6% potassium by weight. For a lawn that tested adequate in P and K, that ratio works well. Ratios around 3:0:2 or 4:0:2 (N:P:K) are commonly recommended for maintenance feeding of established turf.
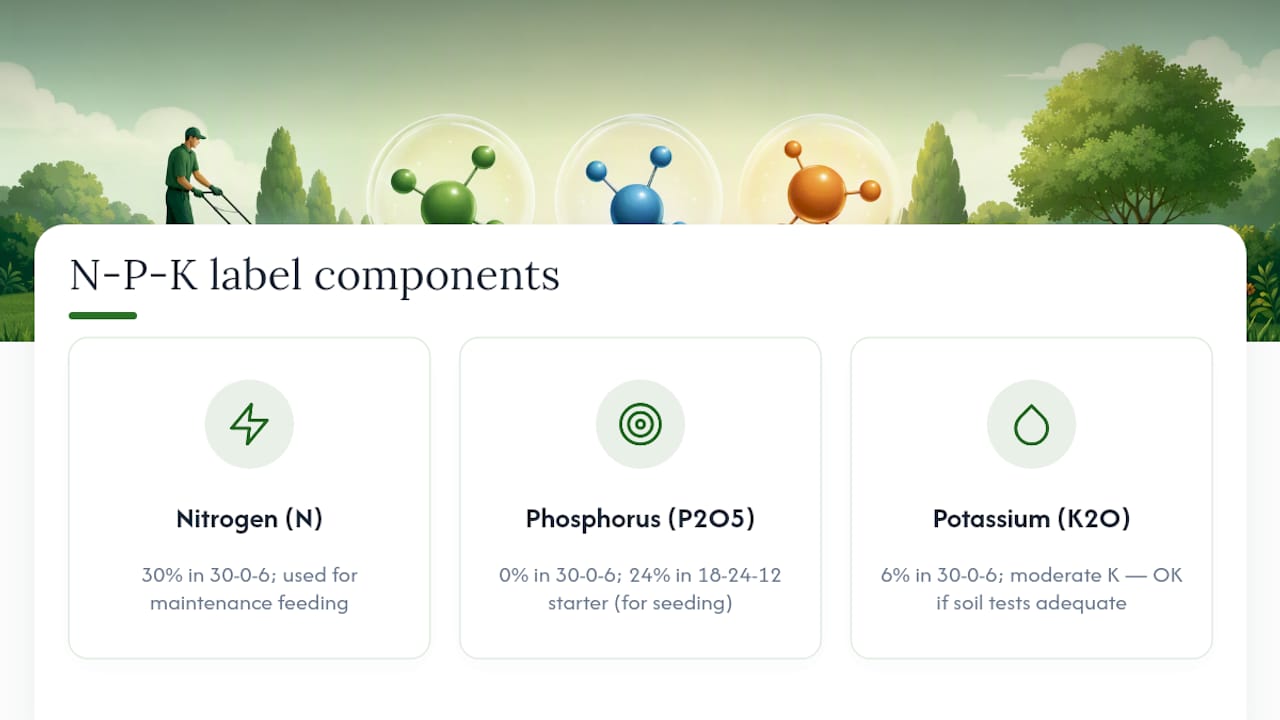
Starter fertilisers with higher phosphorus (e.g., 18-24-12) are appropriate when seeding or sodding a new lawn. Using them on an established lawn with already-adequate phosphorus is wasteful and environmentally irresponsible.
Slow-release vs. quick-release nitrogen
UMN Extension recommends controlled-release nitrogen for home lawns — specifically sulfur-coated urea, polymer-coated urea, IBDU, or ureaform. These release nitrogen gradually over weeks, reducing the risk of burn, leaching into groundwater, and the boom-and-bust growth cycle that quick-release sources create.
Quick-release sources (urea, ammonium sulphate) green up the lawn fast but require more precise timing and carry a higher burn risk, especially in hot or dry conditions. They have a place in early-spring applications when soil temperatures are still cool and microbial activity is low, but for most homeowner use, slow-release is the safer default.
Product forms: granular, liquid, organic
- Granular (slow-release): The most practical choice for most homeowners. Easy to store, apply with a spreader, and calibrate. The Spruce recommends starting light rather than following aggressive manufacturer schedules.
- Liquid concentrate: Faster uptake, useful for correcting a deficiency quickly. Requires more frequent applications and careful dilution. Better suited to small areas or spot treatments.
- Organic (compost, feather meal, blood meal, kelp): Releases slowly, improves soil biology, and carries minimal burn risk. Nutrient percentages are lower, so you need more product per application. A good fit for homeowners reducing chemical inputs over time.
On weed-and-feed products: UMN Extension and most turf specialists advise against them as a default. The herbicide component requires different timing than the fertiliser component, and blanket application treats areas that may not need weed control. Separate the two steps for better results and lower environmental impact.
How do you calculate how much fertilizer to apply?
The target is roughly 1 lb of actual nitrogen per 1,000 sq ft per application. Here is how to convert that into a bag quantity.
Worked example
You want to apply 1 lb of actual N per 1,000 sq ft.
Formula: Bag weight needed = 1 ÷ (N% ÷ 100) = 1 ÷ 0.30 = 3.3 lbs of product per 1,000 sq ft
If your lawn is 5,000 sq ft, you need 3.3 × 5 = 16.5 lbs of product for one application.
Spreader calibration and application pattern
Lowe’s how-to guidance describes the standard approach: set the spreader to the bag’s recommended setting, make perimeter passes first, then fill in with parallel overlapping strips. Overlap each pass by about 15 cm to avoid striping.
- Check the bag for the spreader setting (broadcast or drop) and dial it in before loading.
- Walk at a steady pace — changes in speed change the application rate.
- Make two header strips along the short edges of the lawn first.
- Fill in the middle with parallel passes, overlapping slightly.
- Close the hopper when turning at the end of each pass.
- Use a side-shield or EdgeGuard feature near driveways, sidewalks, and garden beds to prevent granules from landing on hard surfaces or near water.
Pro Tip: Measure your lawn area using a measuring tape or a free satellite-measurement tool like Google Maps’ area calculator before you buy product. Guessing leads to either running short mid-application or buying twice as much as you need.
What aftercare does your lawn need after fertilizing?
Water within 24 hours of applying a granular fertiliser — about 6 mm (¼ inch) is enough to move the product off the granule and into the soil. If light rain is forecast within a day, you can skip the irrigation. What you want to avoid is heavy rain immediately after application, which washes nitrogen off the surface before it can be absorbed.
Mowing and clippings
Mow the lawn two to three days before fertilising so the grass is at a clean, even height. After fertilising, wait at least 24–48 hours before mowing again. When you do mow, return the clippings — they decompose and contribute a small but meaningful amount of nitrogen back to the soil over the season.
Keeping people and pets off the lawn
Follow the re-entry interval on the product label. Most granular fertilisers are safe once the granules have been watered in and the surface is dry, typically a few hours. Liquid fertilisers may require a longer wait. Keep children and pets off the lawn until then, and rinse any granules off paved areas immediately to prevent them from washing into storm drains.
What fertilizer mistakes do homeowners most often make?
The most common error is feeding too early in spring. Applying nitrogen before the soil reaches roughly 10°C pushes leaf growth while roots are still dormant — exactly the false green-up that leaves turf thin and drought-prone by August. The second most common mistake is overapplication, which burns grass and sends excess nutrients into waterways.
Top mistakes to avoid
- Applying before heavy rain: Nitrogen washes off before the soil can absorb it. The Spruce advises timing applications away from forecast storms.
- Skipping spreader calibration: An uncalibrated spreader creates stripes of overfed and underfed grass.
- Using weed-and-feed as a default: The herbicide and fertiliser components rarely need to be applied at the same time. Treat them as separate tasks.
- Applying near water, driveways, or sidewalks without edge control: Granules on hard surfaces wash directly into storm drains. Use a side-shield and sweep up any overspray immediately.
- Ignoring the label rate: Manufacturer schedules are often aggressive. Starting at the lower end of the recommended range and adjusting is the safer approach.
Safety and environmental precautions
Wear gloves and wash hands after handling fertiliser. Store product in a cool, dry location in its original sealed bag. Dispose of leftover product through your municipality’s household hazardous waste programme — do not pour it down a drain or onto bare soil near a waterway. Follow all local bylaws governing fertiliser use near water bodies; many Canadian municipalities have restrictions on phosphorus applications specifically.
Responsible product handling near driveways and hard surfaces reduces the risk of runoff reaching storm drains, which is one of the most direct ways homeowners can protect local waterways. For more on reducing your lawn’s chemical footprint, Yearlong’s guide on reducing lawn chemicals covers practical alternatives.
Pro Tip: After spreading granules near a driveway or sidewalk, use a stiff broom to sweep any stray granules back onto the lawn immediately. It takes 30 seconds and prevents a meaningful amount of phosphorus from reaching the storm drain.
How does compost topdressing fit into your fertilizing plan?
Topdressing with quality compost improves soil structure, feeds soil biology, and supplies slow-release nutrients — but it works as a supplement to a planned nitrogen programme, not a replacement for it. Unless you have access to very high-quality finished compost and are willing to wait two to three seasons for results, you will still need a targeted nitrogen application alongside it.
The best time to topdress is immediately after core aeration, when the soil surface is open and compost can make direct contact with roots. Home Depot Canada notes that thin layers work best — thin layers per pass — so grass blades can grow through the material without being smothered.
How to topdress step by step
- Aerate the lawn first (core aeration, not spike). Leave the cores on the surface — they break down and mix with the compost.
- Spread finished compost at roughly 1–2 L per square metre (about a 3–6 mm layer). Do not exceed this in a single pass.
- Rake lightly to work compost into the aeration holes and around grass blades.
- Water thoroughly to settle the material.
- Repeat once or twice per season over two to three years to see a measurable improvement in soil organic matter.
Combining topdressing with a reduced-rate fertiliser application — say, 0.5 lb N/1,000 sq ft instead of the full pound — lets you build soil health while still meeting the lawn’s immediate nitrogen needs. Over several seasons, as organic matter increases, you can reduce the synthetic input further. For eco-friendly lawn care approaches tailored to Calgary, Yearlong has additional guidance on this transition.
Calgary-specific tips and when to call a pro
Three adjustments matter most for Calgary homeowners. First, the spring fertilising window is shorter here than in most Canadian cities — soil temperatures often do not reach 10°C until mid-May, and a late frost can arrive in early June. Do not rush the spring application. Second, areas near the house where snowpack lingers or where road salt was tracked in during winter may have elevated sodium or compaction; test those spots separately before fertilising. Third, Calgary’s dry climate means irrigation timing after fertilising is critical — without it, granules can sit on the surface for days without activating.
Yearlong’s local lawn care expertise covers these Calgary-specific timing and soil considerations in more detail.
When professional help makes sense
- Large or irregularly shaped properties where spreader calibration across multiple zones is genuinely complex
- Lawns with heavy thatch or compaction that need power raking or aeration before fertiliser will reach the soil
- Water-sensitive sites near storm drains, ponds, or riparian areas where runoff risk requires professional-grade edge control
- Renovation projects involving overseeding, sod replacement, or soil amendment at scale
Yearlong’s lawn care services in Calgary include fertilisation as part of recurring maintenance packages, with local knowledge of Calgary’s soil types, frost dates, and water restrictions built in.
How do Canadian climate zones change your fertilizer approach?
Canada’s climate zones create real differences in what products work and when to use them. The Prairies (Zone 3–4) have cold winters, hot dry summers, and alkaline soils — often pH 7.5 to 8.0. High pH locks up iron and manganese, so a fertiliser with chelated micronutrients or a separate iron sulphate application can make a visible difference in colour. Nitrogen timing is compressed into a shorter active-growth window.
Coastal BC (Zone 8) has mild, wet winters and cool summers. Leaching is a real concern — slow-release nitrogen is especially important here because heavy rainfall moves quick-release nitrogen through the soil profile before grass can use it. The growing season is longer, so three applications per year (spring, midsummer, fall) are often appropriate.
Southern Ontario and Quebec (Zone 5–6) sit closer to the American Midwest in terms of climate. Soils tend to be more acidic, and the longer growing season supports a fuller fertilisation schedule. Phosphorus restrictions are stricter in Ontario — the province’s Cosmetic Pesticides Act and related municipal bylaws limit phosphorus applications on established lawns, so check local regulations before buying a product with a high middle number.
Atlantic Canada (Zone 5–6) has high rainfall and often acidic soils. Lime applications to raise pH are frequently needed before fertiliser can be effective. A soil test is especially important here — feeding a lawn with a pH of 5.5 wastes product.
How do grass varieties across Canada change your fertilizing schedule?
Kentucky bluegrass is the dominant lawn grass across the Prairies and much of Ontario. It goes dormant in summer heat and drought, so mid-summer nitrogen is counterproductive. Feed it in late May and again in late August to early September. It responds well to slow-release nitrogen and benefits from potassium in fall if the soil test indicates a deficiency.
Creeping red fescue and hard fescue are lower-maintenance grasses common in shadier Calgary yards and across Atlantic Canada. They need less nitrogen than bluegrass — roughly half the annual rate — and are more sensitive to overapplication. A single fall feed is often sufficient for fescue-dominant lawns.
Perennial ryegrass establishes quickly and is often mixed with bluegrass in overseeded lawns. It has a similar feeding schedule to bluegrass but tolerates slightly higher nitrogen rates. It does not go fully dormant in summer, so a light midsummer application is acceptable in cooler, wetter regions like coastal BC or Atlantic Canada.
Tall fescue is gaining ground in southern Ontario and BC as a drought-tolerant option. It has a deeper root system than Kentucky bluegrass and needs less frequent watering and feeding. Two applications per year — late spring and early fall — at a moderate nitrogen rate (0.75 lb N/1,000 sq ft) suit it well.
Mixing grass types in one lawn, which is common in older Calgary properties, means calibrating to the most sensitive species in the blend.
What actually matters most when fertilizing a lawn
Most homeowners overthink the product and underthink the timing. The fertiliser brand matters far less than whether you apply it when the grass is actually growing, at the right rate, with a calibrated spreader, and followed by adequate water. A $15 bag of slow-release granular applied correctly in late August will outperform a premium product dumped on frozen ground in April.
The soil test is the step that separates informed lawn care from guesswork. Skipping it means you might be adding phosphorus to soil that already has too much, or applying nitrogen at a rate the soil’s organic matter cannot support. Neither wastes just money — both create real environmental harm downstream.
For Calgary specifically, the compressed growing season means timing errors are more costly than in milder climates. A missed fall window is a full year’s wait. That is the main reason homeowners with larger or more complex properties find professional help worthwhile — not because the task is technically difficult, but because the margin for timing error is narrow.
Sources
- Fertilizing lawns | UMN Extension
- Spring lawn fertilizing guidelines – Wisconsin Horticulture
- Fertilizing your lawn | Illinois Extension
- How to fertilize your lawn the right way for lush grass | Martha Stewart
- When to fertilize your lawn in spring & what to use | The Spruce