

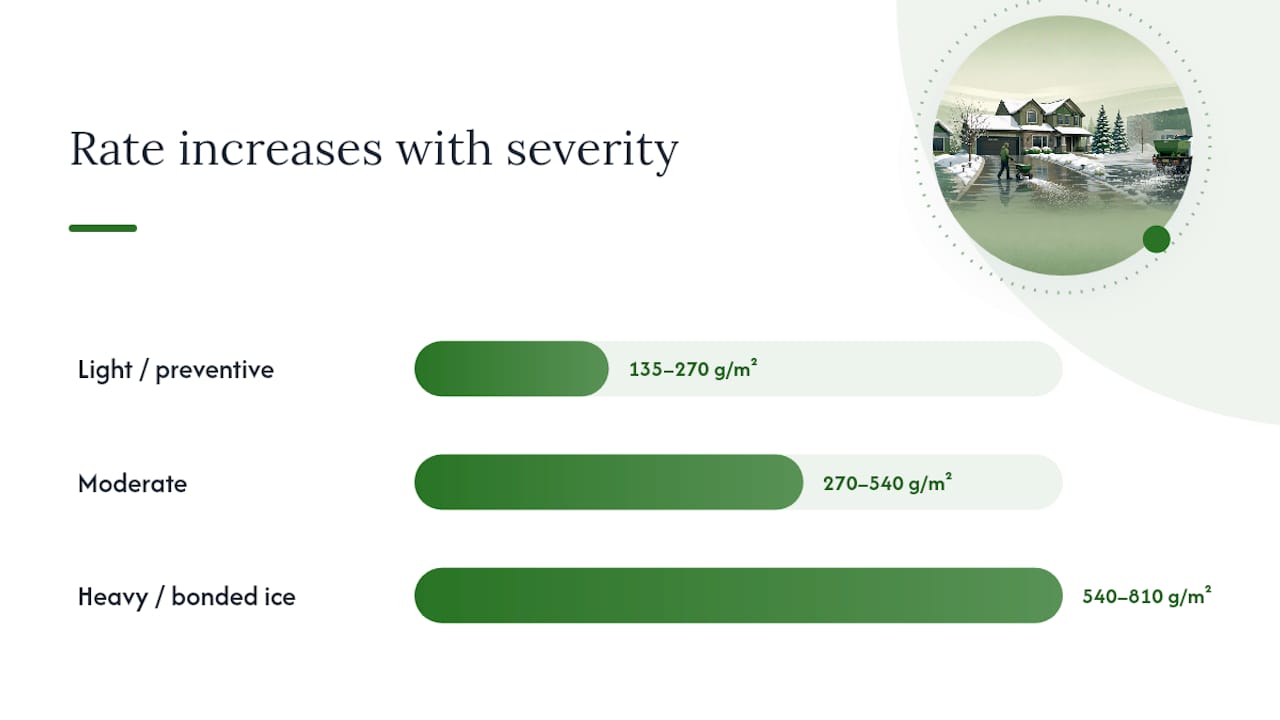
Start with 0.25 to 0.5 lb per square yard for light, preventive conditions, and go up to 1 to 1.5 lb per square yard for heavy, bonded ice. In metric terms, that’s roughly 135 to 270 g/m² on the light end and 540 to 810 g/m² for heavy duty. Those two ranges cover almost every residential and small commercial situation you’ll face this winter, and everything below shows you how to turn them into an actual number of bags to buy.
A few conversions make the math painless. One square yard equals 9 square feet, so a 1,000 sq ft driveway works out to about 111 yd². A standard 50 lb bag weighs 22.7 kg, which is the unit most Calgary suppliers still sell by, even though bag labels increasingly show both.
Here’s the fastest path from “I have no idea” to “I need four bags”:
- Measure the treatment area in square feet, then divide by 9 to get square yards.
- Pick a rate: light for pre-treatment, moderate for typical snowfall, heavy for compacted ice or freezing rain.
- Multiply area (yd²) by rate (lb/yd²) to get total pounds, then divide by 50 to get bag count.
Pro Tip: Round your bag count up, not down. A half-bag short mid-storm means driving to the hardware store in a blizzard, and that’s a worse outcome than a few extra pounds in the garage.
Table of Contents
- Why getting the ice melt amount right actually matters
- How much ice melt to apply at different temperatures
- How to calculate the exact amount you need
- How far a 50 lb bag actually goes
- When to apply ice melt and how to spread it evenly
- Ice melt risks and how to keep them in check
- Budgeting for a season’s worth of ice melt
- How professionals plan ice melt quantities
- What actually matters when you’re the one buying the bags
- Key takeaways for estimating ice melt quantities
- Where the numbers in this guide come from
- Frequently asked questions about ice melt quantities
- Sources
Why getting the ice melt amount right actually matters
Under-applying gives you false confidence. A thin, patchy scatter that doesn’t fully dissolve the ice layer looks like it’s working, but foot traffic can still find the untreated patches, and that’s precisely where someone goes down. The point of the correct application rate isn’t coverage for its own sake, it’s a continuous brine layer that actually breaks the bond between ice and pavement.
Over-applying costs you twice. First in product, since a bag dumped at double the needed rate is money on the ground that runoff washes away before it does much extra work. Second in your concrete, your grass, and your pets. Excess chloride concentrated near expansion joints accelerates spalling, and salt-laden meltwater pooling at the edge of a lawn will brown out turf by spring. Dogs and cats that walk through heavy salt residue and then lick their paws are dealing with irritation that a lighter, well-timed application avoids entirely.
Professional crews lean toward thin, uniform applications precisely because over-application increases runoff and asset risk without adding much real safety benefit. The extra bag rarely buys you extra safety. It just buys you extra cleanup.
- Light coverage that fully dissolves beats heavy coverage that sits in clumps.
- Concrete damage tends to correlate with cumulative seasonal salt load, not any single application.
- Pet paw irritation is largely preventable with rinse routines and lower rates near walkways.
How much ice melt to apply at different temperatures
Application rate and product chemistry are two separate decisions, and conflating them is where most of the wasted product in a Calgary winter comes from.
Application rate bands, expressed per square yard of pavement:
| Condition | Rate (lb/yd²) | Metric (g/m²) |
|---|---|---|
| Light / preventive | 0.25–0.5 | 135–270 |
| Moderate | 0.5 | 270–540 |
| Heavy / bonded ice | 1.0 to 1.5 | 540–810 |
Chemistry and temperature effectiveness:
- Sodium chloride (rock salt): works reliably down to about 15°F to 20°F (minus 9°C to minus 6°C), then loses effectiveness fast. It’s the cheapest option and the most common in bulk bags.
- Calcium chloride: stays effective down to roughly minus 25°F (minus 32°C), and releases heat as it dissolves, which helps it cut through existing ice faster than sodium chloride.
- Magnesium chloride: effective to about 0°F (minus 18°C), generally gentler on concrete and vegetation than sodium chloride, though it costs more per bag.
- Potassium chloride: only effective to about 25°F (minus 4°C), which limits it to mild-condition use and makes it a poor sole choice for a Prairie winter.
Pavement temperature, not air temperature, decides whether your product will work. Sun exposure, shade, and heat retained in concrete or asphalt can put pavement 5°F to 10°F warmer or colder than the air reading on your phone, and a cheap infrared thermometer pointed at the surface tells you more than any weather app. As brine dilutes with continued melting, the freezing point it depresses starts creeping back up, so a surface that was fine at 10 AM can need a top-up by 2 PM even without new snowfall.
The two mistakes that waste the most product: applying sodium chloride when pavement is already below its working range (it just sits there inert), and piling product in one spot instead of spreading it evenly, which leaves half your walkway untreated while the other half gets double dose.
How to calculate the exact amount you need
Four steps take you from a bare driveway to a shopping list.
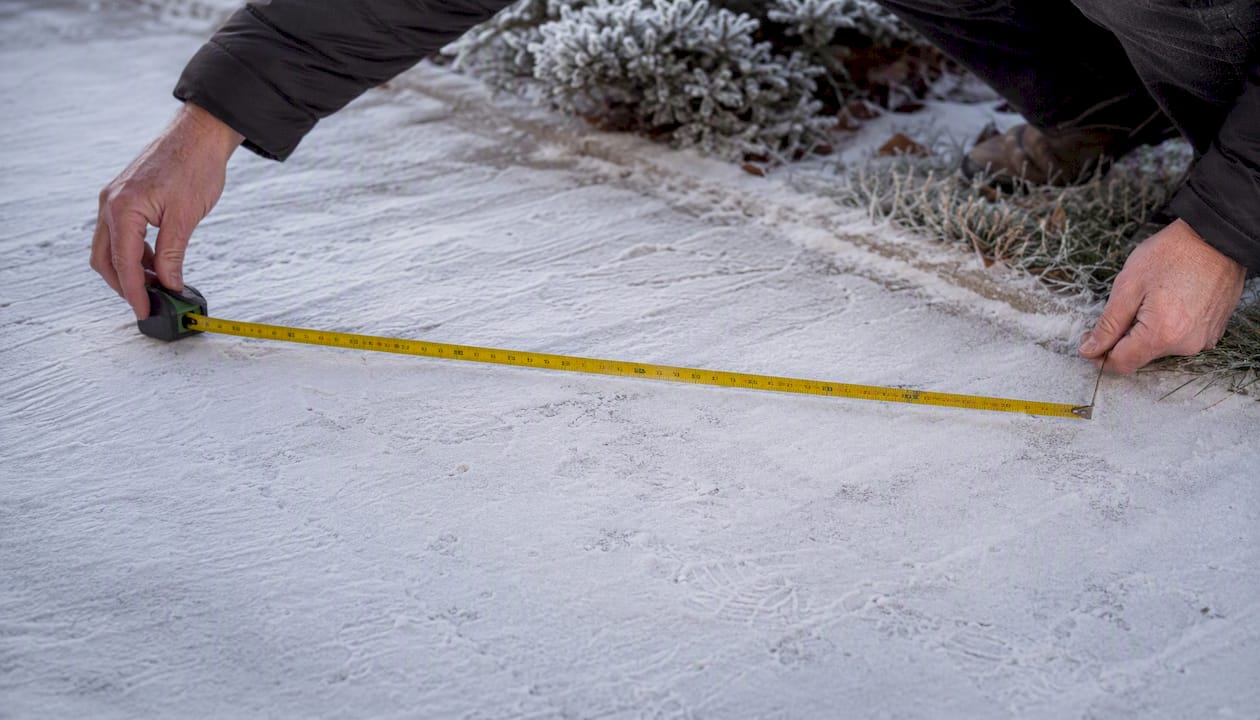
Step 1: Measure the area. Pace it off or use a tape measure, and record square feet. Convert to square yards by dividing by 9.
Step 2: Choose your rate. Match conditions to the bands above. Forecasting freezing rain overnight means treating it as heavy from the start, not waiting to see how bad it gets.
Step 3: Multiply area by rate. Square yards times lb/yd² gives you total pounds of product required.
Step 4: Convert to bags. Divide total pounds by 50 (or kilograms by 22.7), and round up to the nearest whole bag.
Worked example: A typical Calgary driveway and front walk covers about 800 sq ft. That’s 800 ÷ 9 = 89 yd². At a moderate rate of 0.75 lb/yd² for a standard snowfall, you need 89 × 0.75 = about 67 lb of product. Divide by 50, and you’re rounding up to two bags. For a heavy freezing-rain event at 1.25 lb/yd², the same driveway needs 89 × 1.25 = 111 lb, or three bags.
| Step | Formula | Example result |
|---|---|---|
| Area in yd² | sq ft ÷ 9 | 800 ÷ 9 = 89 yd² |
| Total weight (lb) | yd² × rate | 89 × 0.75 = 67 lb |
| Bags needed | lb ÷ 50 | 67 ÷ 50 → 2 bags |
Pro Tip: Keep a laminated card in your garage with your property’s exact square footage already calculated. It saves you from redoing the math every time a storm rolls in at 6 AM.
The reason a heavier ice layer demands more product isn’t just intuition. Melting one kilogram of ice at 0°C absorbs about 334 kilojoules of energy, a fixed physical cost regardless of what chemical you’re using to lower the freezing point. Thicker ice simply has more mass to push through that same energy barrier, which is why doubling ice thickness roughly doubles the product you need, not just the time it takes to melt.
How far a 50 lb bag actually goes
Coverage numbers make bag-buying decisions concrete, and they shift a lot depending on how heavy your conditions are.
| Application rate | Coverage per 50 lb bag (sq ft) | Coverage per 22.7 kg bag (m²) |
|---|---|---|
| Light (0.25 to 0.5 lb/yd²) | ~1,000 sq ft | ~111 m² |
| Moderate (0.75 lb/yd² avg) | ~800 sq ft | ~74 m² |
| Heavy (1.25 lb/yd² avg) | ~360 sq ft | ~30 m² |
Those figures assume a fairly even ice layer. Deep, compacted snowpack or thick glaze ice cuts your effective coverage further, since you’re really applying two treatments in one: breaking the existing bond and preventing a new one from forming. A 2-inch compacted layer can eat through a bag almost twice as fast as a thin glaze would, so treat the numbers above as a starting point for typical conditions, not a hard rule for everything Calgary throws at you.
Quick conversions worth memorizing:
- 50 lb = 22.7 kg
- 1 yd² = 9 ft²
- 1,000 sq ft = 111 yd²
- 1 tonne (metric) ≈ 44 bags at 50 lb each
When to apply ice melt and how to spread it evenly
Pre-treatment before a storm arrives beats reacting after the fact, largely because it stops ice from ever bonding to the pavement surface in the first place. If you’re anticipating snowfall or freezing rain, a light application a few hours ahead creates a barrier layer that makes the eventual cleanup dramatically easier. Professional operations increasingly use liquid brine for pre-treatment rather than granular product, since brine goes down faster and resists blowing off the surface before the storm hits.
Once snow has already fallen, clear the loose accumulation with a shovel or plow first, then apply a thin, even layer of ice melt to what remains. Applying granular product directly onto a few inches of fresh powder wastes most of it, since the pellets never reach the pavement surface where they need to work.
Reapply when you see any of these signals:
- Fresh snowfall accumulates on top of an already-treated surface.
- The existing brine layer has visibly diluted or washed away.
- Pavement temperature drops further after your first application, pushing your original product chemistry near its working limit.
A basic drop or broadcast spreader gives you far more even coverage than hand-scattering, especially across larger commercial lots or shared HOA walkways where consistency across the whole surface actually matters.
Ice melt risks and how to keep them in check
Concrete, lawns, and pets all take some of the impact from de-icing chemicals, and the mitigation steps are simpler than most property owners expect.
Concrete and pavement: Use the lowest effective rate for current conditions, and never dump a concentrated pile expecting it to “work its way down.” Piles create localized freeze-thaw stress right at the point of highest chloride concentration. If staining does show up on driveways or walkways by spring, a guide to removing salt stains from concrete walks through the cleanup process, and professional concrete cleaning handles the deeper residue that DIY methods miss.
Lawns and beds: Keep a buffer zone along grass edges and garden beds where you reduce or skip application entirely, since salt-laden runoff is what actually kills turf, not incidental exposure. Regular bed maintenance going into spring helps beds recover from whatever salt exposure did occur over winter.
Pets: Rinse paws after walks on treated surfaces, and consider pet-safe product lines near entryways where animals spend the most time.
Environmental runoff: Where meltwater drains toward storm systems or sensitive landscaping, lower-chloride products reduce the load reaching those areas, and storing bags in a dry, sealed spot prevents accidental spills from concentrating in one location.
A simple post-storm checklist covers most of it:
- Sweep or rinse excess granules off pavement once the ice has cleared.
- Check buffer zones near lawns and beds for visible salt residue.
- Rinse pet paws if they’ve crossed treated walkways.
- Note any new concrete pitting for spring cleaning or sealing.
Budgeting for a season’s worth of ice melt
A seasonal cost estimate follows the same formula as a single application, just multiplied by expected number of treatment events.
Take that earlier 800 sq ft driveway example: two bags per moderate event, at roughly $12 to $18 per 50 lb bag depending on chemistry and retailer. If a typical Calgary winter brings 15 treatable events, that’s 30 bags, landing seasonal spend somewhere between $360 and $540 for one property. Heavier winters, or properties that lean on calcium chloride for its lower temperature range, push that total higher since premium chemistries cost more per bag than straight rock salt.
The budgeting formula in full: area × rate = total weight, total weight ÷ bag size = bag count, bag count × price per bag = seasonal cost.
- Buy in bulk early in the season when pricing is most favourable.
- Store bags off the concrete floor and away from moisture to prevent premature clumping.
- Rotate older stock to the front so it gets used before it degrades.
How professionals plan ice melt quantities
Level of service, or LOS, is the framework contractors use to turn a vague goal like “keep it safe” into an actual number of tonnes ordered before the season starts. LOS defines treatment frequency, the target surface condition after each visit, and how fast a crew needs to respond once snow starts falling. A property with a two-hour response commitment and a bare-pavement standard needs meaningfully more product on hand than one with a next-morning, mostly-clear standard, even if both properties are the same square footage.
Professionals typically calculate expected tonnage by combining projected number of storm events, average area treated per event, and the chosen application rate, then add contingency for a colder-than-normal stretch. That ordering checklist includes lead time with suppliers, dry storage capacity, having more than one chemistry on hand for different temperature ranges, and a plan for what happens if a cold snap outlasts the stock on site.
Getting the right level of service isn’t about buying the most product. It’s about matching frequency and chemistry to what a specific property’s traffic and liability actually require, then ordering to that plan instead of guessing mid-storm.
Hiring a contractor tends to make sense once a property crosses a certain size or liability threshold, particularly for HOAs and commercial sites where inconsistent treatment creates real slip-and-fall exposure. Yearlong has managed snow removal across Calgary since 2017, and that local footprint means planning around Calgary’s specific freeze-thaw pattern rather than a generic national average. For larger or multi-tenant sites, the operational demands look different again, and a practical guide to snow removal methods for offices covers what changes at that scale. Winter prep rarely stops at ice melt alone, and partners like Thomas Roofing and Repair’s guide to winter roof repairs round out a fuller seasonal maintenance picture.
What actually matters when you’re the one buying the bags
The instinct to over-buy “just in case” is understandable, but it’s usually the wrong call. I’d rather see a property owner measure their driveway once, calculate a real number, and buy slightly more than that number, than guess high and end up storing half a pallet of rock salt that clumps into a brick by February.
Start with the light or moderate rate for your first application of the season, and only step up to heavy-duty rates once conditions actually demand it. Most properties never need the top end of the range as often as they think they will. Run the worked examples above against your own square footage before you place an order, and if the numbers get complicated fast because you’re managing more than one site or a shared commercial lot, that’s usually the point where a conversation with a local provider about bulk pricing and a season contract pays for itself.
Key takeaways for estimating ice melt quantities
Getting the right amount of ice melt down to a property comes down to measuring area accurately, matching rate to real conditions, and applying thin, even coverage rather than heavy piles.
| Point | Details |
|---|---|
| Match rate to conditions | Use 0.25–0.5 lb/yd² for light, 0.5 for moderate, 1.0 to 1.5 for heavy ice. |
| Measure before you buy | Convert square footage to square yards, then multiply by your chosen rate. |
| Check pavement, not air | Pavement temperature decides which chemistry actually works, not the weather app. |
| Spread thin and even | Uniform light coverage beats concentrated piles for safety and asset protection. |
| Store product properly | Keep bags dry and elevated to prevent clumping and preserve effectiveness all season. |
Where the numbers in this guide come from
The physics behind why thicker ice needs more product traces back to the heat of fusion for water, the energy constant that explains why melting ice is a genuine thermal process rather than a simple mechanical one.
For broader context on ice loss trends, NASA’s ice sheet tracking and Copernicus’s glacier mass balance records document how observational science measures ice loss at a planetary scale, even though the mechanisms differ from a treated driveway. A global glacier mass synthesis published in Nature found losses averaging roughly 273 gigatonnes per year between 2000 and 2023, underscoring how consistently ice responds to sustained above-freezing conditions, whether on a mountain range or a parking lot.
Frequently asked questions about ice melt quantities
How much ice melt do I need per square foot?
Divide your square footage by 9 to get square yards, then apply 0.25 to 1.5 lb per square yard depending on conditions. An 800 sq ft driveway (89 yd²) needs roughly 22 to 130 lb of product across that range.
How fast does ice melt once product is applied?
Granular product typically starts working within 15 to 30 minutes as it dissolves into brine, though full melt-through on thick ice can take an hour or more depending on temperature and product chemistry.
Does colder weather mean I need more ice melt?
Not necessarily more volume, but you likely need a different chemistry. Sodium chloride stops working effectively below about 15°F to 20°F, so calcium or magnesium chloride becomes the better choice rather than simply applying more rock salt.
Can I use less ice melt if I shovel first?
Yes. Clearing loose snow before applying product means the ice melt reaches the pavement surface directly instead of getting wasted in a snow layer, often cutting the amount needed by a third or more.
How do I store leftover ice melt bags for next season?
Keep bags sealed, off the concrete floor, and away from moisture. Product exposed to humidity clumps and loses effectiveness well before the bag is empty.
Sources
- Ice Sheets – Earth Indicator – NASA Science
- Glaciers | Copernicus
- Community estimate of global glacier mass changes from 2000 to 2023 | Nature (Springer Nature Link)
- OpenStax — Phase change and latent heat
One Response