

Pile snow only in preplanned zones that stay downhill of traffic, clear of drains, and out of sightlines at exits and entrances. Mark those zones before the first storm, cap pile height at roughly twice the reach of the equipment stacking it, and haul snow off-site the moment a pile blocks a stall, aisle, or drain. Keep dated service logs and photos throughout the season. Skip any of those four steps and you are managing a liability, not a parking lot.
TL;DR:
- Snow piles should be placed only in premarked zones downhill of traffic, drains, and sightlines, with height limited to twice the equipment’s reach.
- Crews must regularly check pile stability, cap height, and reposition or haul snow when it obstructs stalls, sightlines, or causes pooling.
- Proper planning, marking, and documentation of stacking zones and response procedures reduce liability and prevent emergency access issues.
- Anti-icing with pre-wetted brine before snowfall significantly cuts material use and improves safety compared to reactive de-icing.
- Establishing a written snow operations plan with clear triggers, service logs, and designated zones ensures consistent and efficient winter management.
Table of Contents
- Choosing safe parking lot snow piling locations and marking stacking zones
- Pile sizing, stacking practices, and stability limits
- Managing meltwater and drainage to prevent refreeze
- When should you relocate or haul snow off-site?
- Anti-icing, pre-wetting, and de-icing strategies that actually save money
- Building a preseason snow operations plan for your property
- Why the plan matters more than the plow
- Get a marked stacking plan instead of guessing every storm
- Sources
- FAQ
Choosing safe parking lot snow piling locations and marking stacking zones
Every lot needs a site walk before the first snowfall, not after. Walk the property and flag every drain, fire lane, loading dock, accessible stall, and the natural downhill slope of the pavement, since meltwater always follows gravity whether you planned for it or not.
Good pile zones share three traits: they sit downhill from active traffic, they’re reachable by a loader or blower without cutting across a drive aisle, and they never obstruct sightlines at an intersection or exit. A snow pile placement plan built around circulation routes first, rather than whatever pavement happens to be empty, keeps emergency access clear all winter.
Once you’ve picked the zones, mark them so a crew working in a 5 a.m. whiteout doesn’t have to guess:
- Paint curb segments or use plow stakes at the boundary of each zone
- Note a primary zone and a backup zone in case the first fills up
- Tie a capacity limit to a fixed reference point, like a light pole or a painted line, not a subjective “that looks full” call
- Put it all on an annotated site map crews can check before every shift
Pile sizing, stacking practices, and stability limits
A pile that’s too tall or too steep does two things badly: it collapses without warning, and it blocks the sightline of anyone backing out nearby. The safe working rule is straightforward.
- Cap pile height at roughly twice the height of the equipment doing the stacking, since piles built taller than that lose stability and increase collapse risk.
- Push snow up and back rather than out, so the footprint doesn’t creep further into parking stalls with every storm.
- Check the pile from driver eye height, not from the cab of the loader, since what looks fine from above can block a stop sign from a sedan’s windshield.
- Reassess after every storm. A pile that was fine in December often needs trimming or relocating by February, because repeated pushes widen the base faster than they raise the peak.
Crews should treat this as a two-minute check at the end of each pass, not an afterthought at season’s end.
Managing meltwater and drainage to prevent refreeze
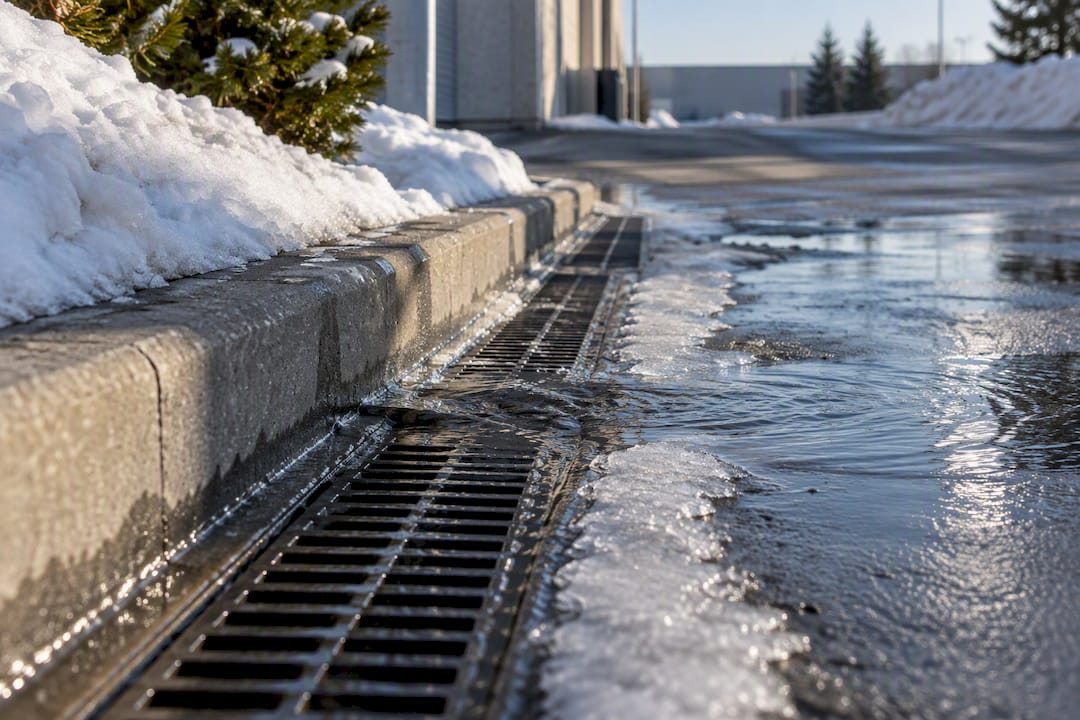
Snow piled in the wrong spot turns into a skating rink after the sun does its work. Meltwater follows the same downhill path the snow itself would take, so trace that path before you commit to a stacking zone, not after a pile is already three feet high and refusing to move.
Before the first snowfall, clear catch basins and confirm downspouts and gutters don’t discharge onto a walkway, since blocked deck drains are one of the most common causes of overnight refreeze on ramps and pedestrian paths. A few preseason tasks prevent most of the trouble:
- Clear and test every catch basin and deck drain
- Redirect any downspout that empties across a walking route
- Grade temporary channels away from doorways and accessible ramps
- Use absorbent buffers or temporary berms where runoff genuinely can’t be redirected
Pro Tip: Walk the lot an hour after the sun hits the piles on a mild afternoon. Wherever water is pooling or crossing pavement, that’s your refreeze zone for the overnight low, and it needs sand, salt, or a barricade before dark.
When should you relocate or haul snow off-site?
Piling only works until it doesn’t. Once a pile starts costing you function, whether that’s a stall, a sightline, or a drain, stacking stops being free storage and starts being a hazard sitting in plain sight.
- Haul when a pile has swallowed marked stalls the property genuinely needs for operations that day.
- Haul when the pile blocks sightlines at an entrance, exit, or intersection, since a partially blind corner is a liability the moment a vehicle backs out.
- Haul when a pile encroaches on an accessible route or a fire lane, both of which have zero tolerance for “temporary” obstruction.
- Haul when meltwater from a pile can no longer drain and starts pooling against a building or across a walkway.
Decide in advance who has authority to call a haul, whether that’s a site manager or the contractor, so nobody’s waiting on an email chain while a stall stays buried. Larger properties do well to book a hauling vendor before the season starts at a set rate, since last-minute hauling during a heavy storm cycle almost always costs more.
Anti-icing, pre-wetting, and de-icing strategies that actually save money
Treating pavement before snow falls beats scraping it off after. Anti-icing, applying liquid brine ahead of a storm so snow and ice never bond to the surface, can be roughly 50% more efficient than reactive de-icing, which is a meaningful difference in both material cost and crew hours over a full season.
Timing and rates that matter:
- Brine works best applied 1 to 2 hours before precipitation starts, though it can go down 2 to 3 days ahead in some conditions
- A common starting rate is a modest amount of brine per 1,000 square feet as a starting guideline
- Skip anti-icing ahead of an event that starts as freezing rain rather than snow, since the outcome differs and pre-treatment can backfire
- Always plow first, then spread granular material, never the reverse
- Pre-wetting salt before spreading cuts scatter and bounce, and it kick-starts the brine reaction so it melts faster with less product used
A three-year field project called SICOPS ran close to 5,000 tests across nearly 100 winter events and found that matching material and application rate to local conditions, rather than using one blanket approach everywhere, consistently performed better. Storage and environmental runoff matter too: keep bulk salt covered and away from drains, and choose rates that treat the surface without oversaturating pavement joints.
Building a preseason snow operations plan for your property
A written plan beats a verbal understanding every time a new hire is on shift or a manager is out sick. At minimum, the plan should name the service level (how many hours after snowfall triggers a plow), the objective triggers for hauling, the priority sequence for the lot (fire lanes and accessible routes first), and the marked stacking zones from your site map.
If you’re working with a contractor, verify these items are in the contract, not just implied in conversation:
- Anti-icing capability and calibrated spreader equipment, since uncalibrated spreaders waste material and undertreat pavement
- A stated response time tied to snowfall amount, not a vague “as soon as possible”
- Service logs delivered after every visit, not just invoiced at month’s end
Every event should generate a record: date, time, surface treated, product and quantity used, pavement temperature, and a few timestamped photos. That documentation is the single strongest piece of evidence in a slip-and-fall dispute, and it costs nothing but a few minutes per visit. A documented workflow also makes it far easier to spot which zones fill up fastest, so next season’s plan gets sharper instead of starting from scratch.
Why the plan matters more than the plow
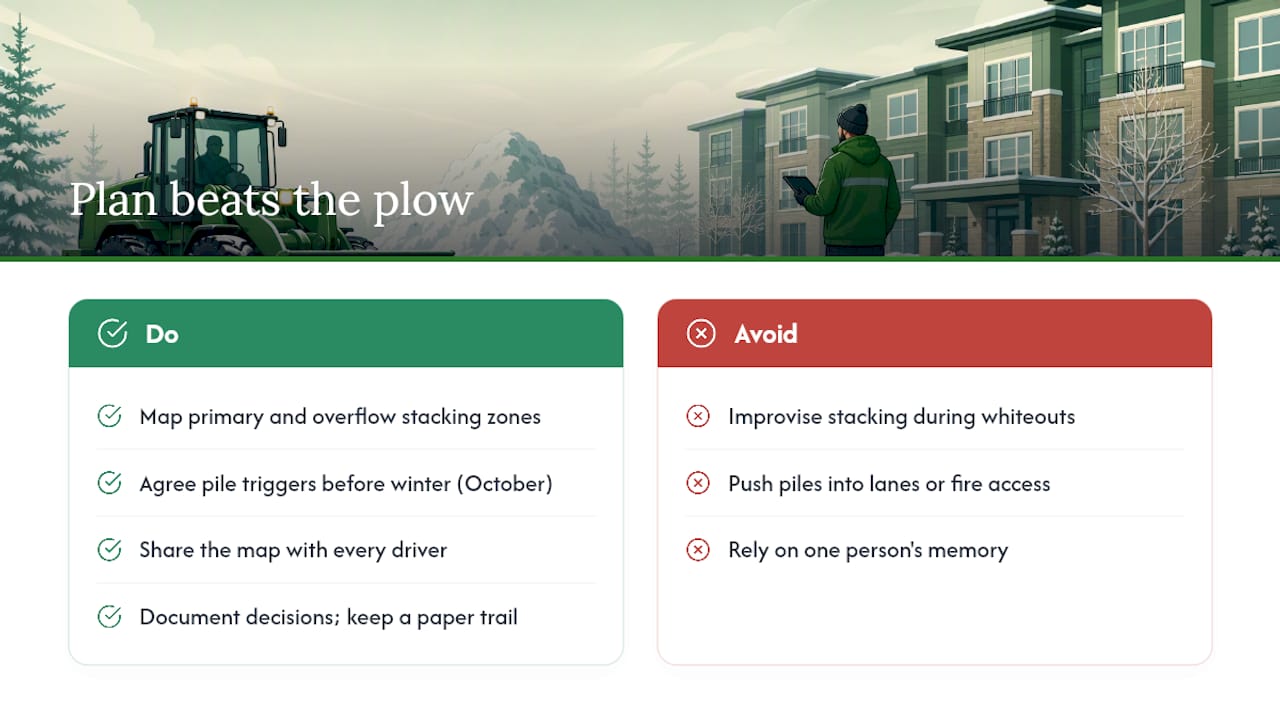
The properties that avoid snow-pile headaches aren’t the ones with the biggest loader. They’re the ones where every driver already knows which corner is the primary stacking zone and which one is the overflow, because it’s on a map, not just in someone’s head from last winter.
The lots that get into trouble are almost always the ones improvising a decision at 2 a.m. in a whiteout: “just push it over there” becomes a pile blocking a fire lane by morning. Agreeing on triggers and zones in October means nobody has to make that judgment call under pressure, and the paper trail that comes with it protects everyone if something does go wrong later.
— Lewie
Get a marked stacking plan instead of guessing every storm
Some services build the site walk, the marked stacking zones, and the anti-icing schedule into one plan instead of leaving your parking lot to whatever a plow driver decides at 3 a.m. Some Calgary properties get a response aimed at within 6 hours of snowfall, well ahead of the 24-hour standard many services default to, plus documented service logs after every visit so you have a paper trail if a claim ever comes up.

A typical engagement starts with a walk of your lot to flag drains, sightlines, and accessible routes, then a written plan marking primary and backup pile zones before the season starts. From there it’s scheduled plowing and hauling, pre-wetted salt application, and a log delivered after each visit. If your current setup is a phone call and a hope, request a snow removal quote from Yearlong and get a written plan in place before the next storm rolls in.
Sources
- CT GSP: Best management practices for parking lots and sidewalks (anti-icing and pre-wetting guidance) — 2023
- Winterizing parking facilities: the snow and ice season prep checklist (Parking Operator Hub)
FAQ
How long will snow piles last?
It depends on temperature, sun exposure, and pile size, but a large, shaded pile can easily outlast the rest of the melted lot by several weeks into spring. Piles placed on the sunny south side of a lot melt fastest, which is one more reason placement matters more than most managers assume.
How do you stop snow from piling up on a driveway or approach lane?
Anti-icing the surface before a storm prevents snow from bonding to pavement in the first place, which is why pre-treating with brine works better than waiting to scrape it off after. Regular plowing at set snowfall triggers, rather than waiting for a full accumulation, also keeps buildup from compacting into ice.
What do you call a big pile of snow?
Most operators simply call it a snow pile, a stockpile, or a snow storage zone when it’s marked on a site plan. There’s no separate technical term for it beyond describing its function and location on the lot.
What is the concrete post or barrier structure in a parking lot called?
Those short concrete or rubber posts marking parking stall boundaries or curb edges are called wheel stops or bumper blocks, and taller cylindrical ones are bollards. Both should be flagged and marked before winter, since a buried bollard or wheel stop is a common cause of plow damage and a hidden trip hazard once snow melts.
Does Yearlong offer a written snow pile stacking plan?
Yes, Yearlong’s snow removal service includes a site walk and a marked stacking plan as part of setting up seasonal service. Current pricing starts from $130 per month, with details available on the snow removal page.