

For most Canadian yards, steel or aluminium edging is the best all-round pick: it holds a crisp line, survives freeze-thaw cycles, and lasts 15–25+ years without repeated replacement. Here is a fast breakdown of every major material and where each one shines:
- Steel edging — best for straight runs, formal beds, and high-traffic areas where rigidity matters
- Aluminium edging — best for curves and any spot with road-salt exposure; lighter and corrosion-resistant
- Plastic/vinyl edging — best for tight budgets and low-stakes DIY; plan to replace it every 3–5 years in cold climates
- Rubber edging — best for gentle curves and mower-friendly edges; forgiving underfoot
- Wood/bender board — best for cottage or rustic gardens; needs sealing or replacement as it weathers
- Stone, brick, or concrete pavers — best for decorative, permanent borders with strong visual presence
- Poured concrete curbing — best long-term investment for defined, maintenance-light edges; requires professional equipment
- Boulders — best for naturalistic or prairie-style gardens; zero maintenance once placed
Quick pick for most Calgary homeowners: aluminium edging, 3–4 inches tall, staked at 12-inch intervals. It bends around curves, shrugs off road-salt spray, and will still look sharp a decade from now.
Key takeaways
Aluminium edging is the best all-round choice for most Canadian yards: it handles curves, resists frost heave when set at 4 inches deep, and outlasts plastic by a decade or more.
| Point | Details |
|---|---|
| Metal edging lasts longest | Steel and aluminium last 15–25+ years; plastic typically needs replacing every 3–5 years in freeze-thaw climates. |
| Installation depth is critical | Set metal edging at least 4 inches deep and backfill with coarse sand to reduce frost heave in Calgary clay soils. |
| Aluminium beats steel near roads | Aluminium resists road-salt corrosion better than standard steel; use it for any bed within 5 metres of a salted street. |
| Poured concrete is the permanent upgrade | Professionally installed concrete curbing lasts 20+ years with minimal upkeep; it requires contractor equipment. |
| Yearlong handles edging in Calgary | Yearlong installs and maintains bed edging across Calgary, with seasonal cleanup packages and poured curbing referrals. |
Table of Contents
- What are the main garden bed edging materials?
- How do edging materials compare across cost, durability, and climate?
- How do you install common edging types, and what tools do you need?
- How do Canadian winters change which edging you should choose?
- What are the most common edging mistakes, and how do you fix them?
- Creative edging ideas for different garden styles
- When should you DIY, and when should you hire a professional?
- What actually works in Calgary yards: a contractor’s perspective
- Yearlong’s bed maintenance and edging services in Calgary
- Sources
What are the main garden bed edging materials?
Every edging material falls somewhere on a spectrum between cheap-and-temporary and expensive-and-permanent. Knowing what each one actually looks like in a garden helps you match material to style before you spend anything.
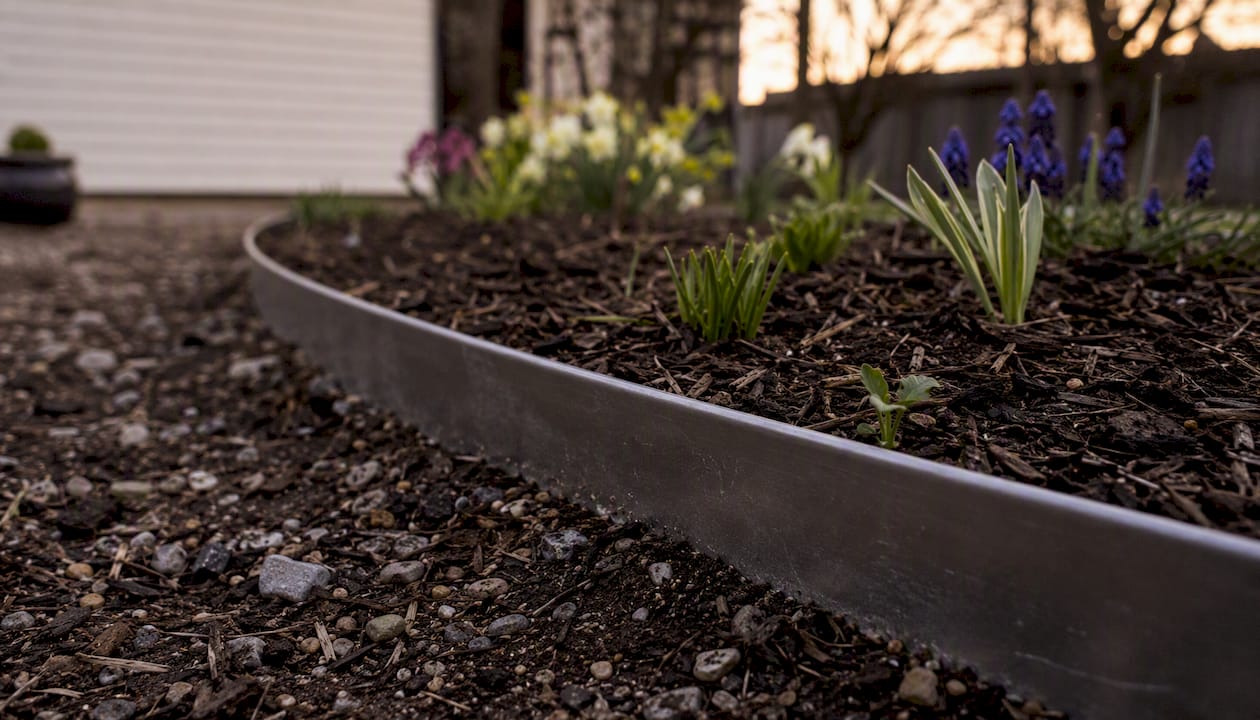
Metal (steel and aluminium) comes as thin strips, typically 3–5 inches tall, sold in 8–16 ft lengths or coil rolls. Steel is heavier gauge and nearly invisible at grade, giving modern and formal beds a razor-sharp edge. Aluminium is slightly thinner but bends more easily for curves. Both read as clean and minimal in the garden. Cost runs medium to high upfront; lifespan is 15–25+ years. Permaloc’s material guide confirms aluminium suits curves and corrosion-prone spots while steel delivers maximum rigidity for straight runs.
Plastic and vinyl arrive as flexible coil rolls or rigid bender board. Economy rolls cost roughly $0.50–$1.50 per foot and are the most common sight at big-box stores. Professional-grade resin bender board is stiffer and thicker, closer to a mid-range product. Visually, plastic sits low and nearly disappears, which suits informal beds. The trade-off is longevity: UV and frost degrade thin plastic quickly.
Rubber edging is moulded from recycled tyres, sold as rolls or interlocking sections. It is flexible, soft underfoot, and sits flush with the lawn surface, which makes mowing along it easier. Visually it is low-profile and dark. Lifespan is moderate, roughly 10–15 years depending on UV exposure.
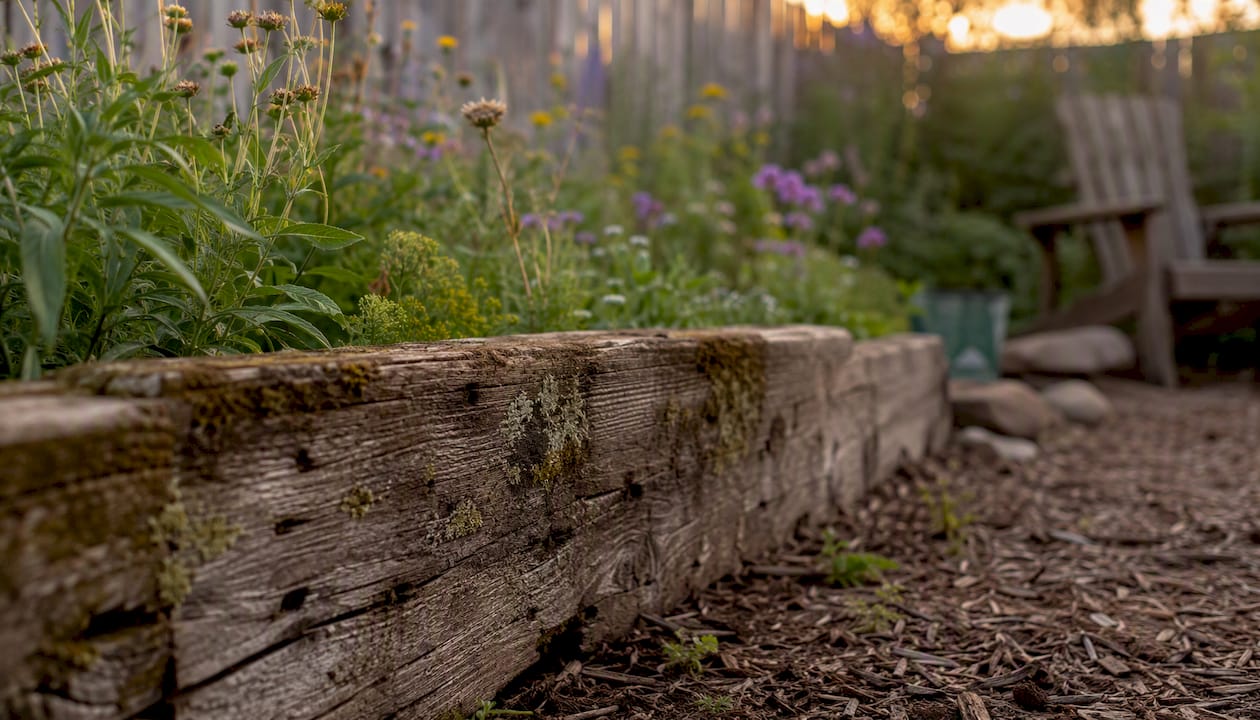
Wood and bender board covers everything from rough-sawn landscape timbers to thin redwood or cedar bender board. Timbers give a bold, raised border; bender board is thin enough to curve. Untreated wood rots within a few years in Calgary’s wet springs. Treated or naturally rot-resistant species last longer but still need periodic inspection. The look is warm and organic, fitting cottage or farmhouse styles well.
Stone, brick, and concrete pavers are set individually or stacked. Brick and cut stone give a formal, traditional edge; fieldstone or flagstone reads as rustic. Cost varies widely by stone type, but installation labour pushes the total higher. Lifespan is effectively permanent if the base is set correctly. Fine Gardening’s installation guide recommends checking soil stability before setting any masonry edge.
Poured concrete curbing is machine-extruded on-site by a contractor. It creates a continuous, seamless border in various profiles (mower-friendly, slant, scallop). It is the most labour-intensive option and the most permanent. Typical lifespan exceeds 20 years with minimal upkeep.
Boulders are placed, not installed. A single row of medium-sized fieldstone or granite boulders defines a bed without any digging. They suit naturalistic, prairie, or xeriscape gardens and require no maintenance beyond occasional repositioning.
How do edging materials compare across cost, durability, and climate?
The Spruce’s testing roundup and Lowe’s buying guide both stress that climate, soil, and maintenance commitment should drive material choice as much as upfront price. The table below maps each material across the dimensions that matter most for Canadian yards.
| Material | Typical cost | Lifespan | Maintenance | Install difficulty | Best for | Frost resistance | Eco notes |
|---|---|---|---|---|---|---|---|
| Steel | Medium-high | 15–25+ yrs | Low | Moderate | Straight runs, formal beds | Excellent | Recyclable |
| Aluminium | Medium-high | 15–25+ yrs | Low | Easy-moderate | Curves, salt exposure | Excellent | Recyclable |
| Plastic/vinyl | Low | 3–5 yrs | Medium | Easy | Budget DIY, temporary | Poor-fair | Petroleum-based |
| Rubber | Low-medium | 10–15 yrs | Low | Easy | Curves, mower-friendly | Good | Recycled content |
| Wood/bender board | Low-medium | 5–15 yrs | Medium-high | Easy-moderate | Cottage, rustic | Fair | Renewable if untreated |
| Stone/brick pavers | Medium-high | 20+ yrs | Low-medium | Moderate-hard | Decorative, formal | Good (if set deep) | Natural material |
| Poured concrete | High | 20+ yrs | Low | Pro only | Permanent, low-maintenance | Excellent | High embodied energy |
| Boulders | Medium-high | Permanent | None | Easy-moderate | Naturalistic, xeriscape | Excellent | Natural material |
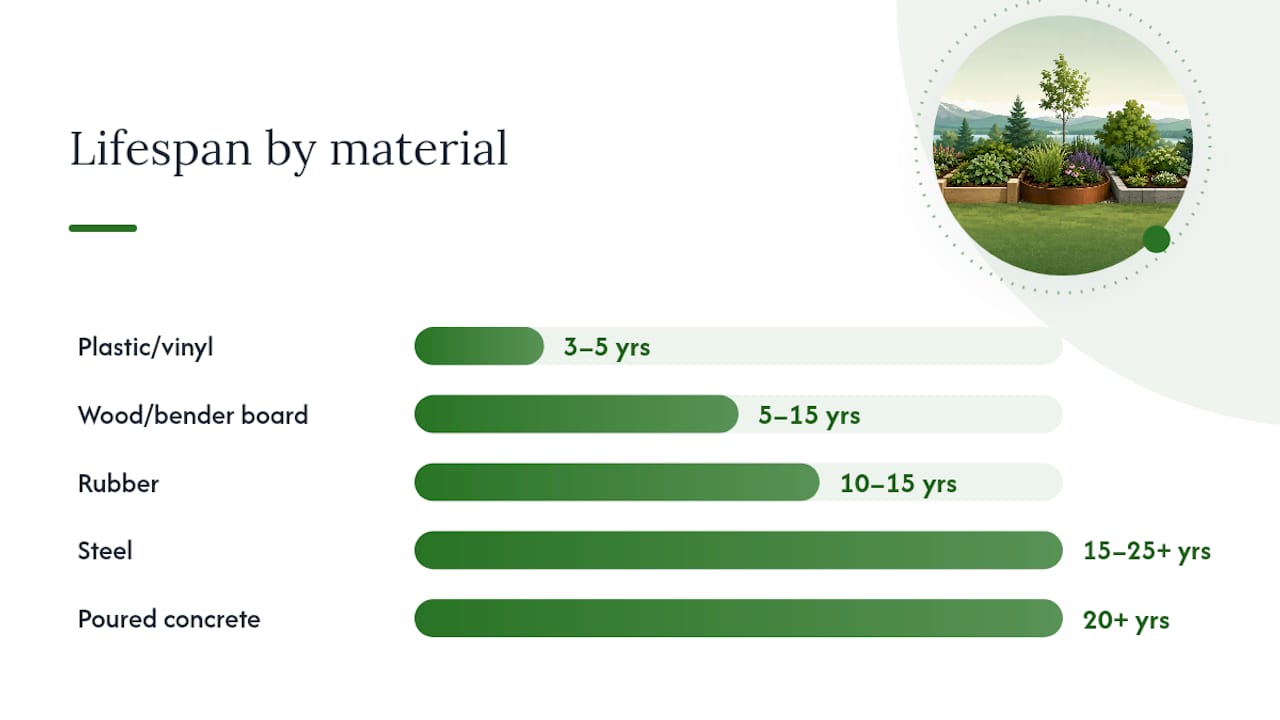
A comparison of 12 edging materials maps similar cost and lifespan ranges and reinforces that matching material to garden style is as important as matching it to budget.
How do you install common edging types, and what tools do you need?
Installation quality determines longevity more than material choice alone, according to Fine Gardening’s edging guide. A shallow trench or poorly staked run will shift within one freeze-thaw season regardless of what material you chose.
General DIY sequence (all material types)
- Mark the line. Use a garden hose or spray paint to define the bed edge before you dig anything.
- Cut the trench. A flat spade or half-moon edger works for most materials. Metal and plastic need a trench 3–5 inches deep; stone and brick need 4–6 inches plus a compacted gravel base.
- Place and stake. Set the edging so the top sits at or just above grade. Drive stakes every 12 inches for metal; every 18–24 inches for plastic. Use a rubber mallet to seat stakes flush.
- Connect sections. Metal uses coupling stakes or sleeves; plastic uses manufacturer connectors. Gaps between sections are where weeds enter.
- Backfill and compact. Push soil back against both sides of the edging and tamp firmly. Check with a level on longer straight runs.
- Finish the bed edge. Cut a clean vertical face on the garden side with a half-moon edger or flat spade.
Time estimates for a 30 ft run
- Plastic roll: 30–45 minutes
- Metal (aluminium or steel): 1–2 hours
- Brick or stone pavers: 3–5 hours (includes base prep)
- Poured concrete: contractor job; typically half a day on-site
Essential tools
Flat spade, half-moon edger, rubber mallet, metal stakes, level, measuring tape, garden hose (for layout), wheelbarrow (for stone/brick), tamper or hand compactor (for masonry bases).
Pro Tip: To pre-bend aluminium edging for a tight curve, lay the strip on the lawn and walk slowly along it, pressing down with your foot at 6-inch intervals. This creates a smooth, consistent arc without kinking. Never try this with steel — it requires a bending jig.
How do Canadian winters change which edging you should choose?
Calgary’s climate is harder on edging than most homeowners expect. The city averages more than 30 freeze-thaw cycles per year, and the clay-heavy soils common across much of the city amplify frost heave. When water in the soil freezes, it expands and pushes edging upward; when it thaws, the edging drops back unevenly. Over a few seasons, this buckles plastic, cracks thin concrete, and shifts brick pavers out of alignment.
Metal and poured concrete handle frost heave best because they flex slightly (metal) or are continuous and reinforced (concrete). Stone and brick hold up well when set on a compacted gravel base that extends below the frost line, roughly 18 inches in Calgary. Thin plastic and untreated wood are the most vulnerable. As the Lowe’s buying guide notes, soil type and climate should be primary decision factors, not just aesthetics.
Calgary also uses road salt heavily from October through March. Salt spray reaches front-yard beds within a few metres of the street. Aluminium resists corrosion far better than standard steel in salt-exposed spots, a point Permaloc’s guide makes explicitly. For beds more than 5 metres from a salted road, either metal type performs well.
Seasonal maintenance checklist for Calgary yards
- Late October: Clear mulch away from edging to prevent moisture trapping under snow; check stakes are flush before freeze-up
- After each major snowfall: Avoid piling snow directly on plastic edging; the weight and repeated freeze-thaw at the snow pile base accelerates cracking
- March/April: Walk the entire bed perimeter after the last hard frost; re-stake any heaved metal sections; reset shifted bricks; replace cracked plastic runs before the growing season starts
- May: Top up mulch to the edging line; cut the bed face clean with a half-moon edger
Pro Tip: When installing metal edging in Calgary, bury the bottom 1–2 inches below the frost-heave zone by setting it at least 4 inches deep and backfilling with coarse sand rather than clay. Sand drains faster, freezes with less expansion, and dramatically reduces how much the edging moves over winter. Understanding how Calgary’s climate shapes landscaping choices helps you make smarter material decisions from the start.
What are the most common edging mistakes, and how do you fix them?
Most edging failures trace back to installation shortcuts, not material defects. A native plant gardening source notes that plastic edging in particular varies widely in quality, and that installation details determine whether even a good product lasts.
Common mistakes to avoid:
- Too-shallow trench. Edging set less than 3 inches deep heaves out of the ground in the first winter. Minimum depth is 3–4 inches for metal and plastic; 4–6 inches for masonry.
- Skipping the weed barrier. Edging controls grass migration, not weed seeds. A layer of landscape fabric or cardboard under mulch does the job edging cannot.
- Poor staking intervals. Stakes spaced more than 18 inches apart on metal edging allow the strip to bow outward under soil pressure. Tighten to 12 inches on curves.
- No expansion allowance. Plastic and rubber expand in heat. Leave a 1/4-inch gap at every connector joint or the edging will buckle in July.
- Mismatched height. Edging set too high above grade looks awkward and catches mower blades. The top edge should sit no more than 1/2 inch above the lawn surface on the grass side.
Repair tips:
- Shifted brick or stone: lift the affected section, add or remove base material to level, reset and tamp.
- Cracked or brittle plastic: cut out the damaged section with tin snips and splice in a new piece using manufacturer connectors.
- Heaved metal: drive the stake back down with a rubber mallet; if the edging strip has bent, straighten it by hand before re-staking.
- Concrete curbing cracks: small surface cracks can be filled with concrete patching compound; structural cracks typically need a contractor to saw out and re-pour the section.
For a full seasonal approach to keeping lawn beds in good shape, consistent spring and fall checks prevent small shifts from becoming expensive repairs.
Creative edging ideas for different garden styles
Edging is not just a functional border; it sets the visual tone for the entire bed. The height, profile, and material you choose either reinforces or contradicts the planting style around it.
Cottage gardens suit informal materials: tumbled brick laid in a single course, rough fieldstone, or low timber borders. Slightly uneven placement reads as intentional rather than sloppy. Avoid razor-sharp metal here; it fights the loose, abundant planting style.
Modern and minimal gardens are where thin steel or aluminium edging earns its keep. A 3-inch steel strip set flush with the lawn creates a shadow line that makes even a simple grass-and-gravel bed look considered. Pair it with a clean gravel mulch and architectural plants like ornamental grasses or Karl Foerster.
Rustic and farmhouse gardens work well with weathered wood timbers, stacked fieldstone, or gabion-style wire-and-stone borders. Reclaimed railway ties (check for creosote content before using near edibles) give a bold, chunky edge that suits vegetable gardens and raised beds.
Formal gardens call for cut stone, brick laid in a running bond pattern, or continuous concrete curbing. Symmetry matters here; use a string line and level obsessively during installation. Martha Stewart’s garden edging roundup shows how cobblestone and scalloped brick shift the entire character of a formal bed.
Contemporary industrial gardens can use Corten steel (which develops a rust patina), raw concrete pavers set on edge, or recessed LED strip lights along a metal edging profile. The patina of Corten steel deepens over time and looks intentional rather than neglected.
A few creative details worth trying: glass pebbles pressed into a mortar bed between pavers catch light in evening gardens; upside-down wine bottles buried neck-down create a surprisingly durable and colourful cottage border; mixing two materials at a corner transition (metal on the straight run, brick at the curve) adds visual interest without looking chaotic.
When should you DIY, and when should you hire a professional?
Most plastic, rubber, and aluminium edging installs are genuine DIY territory. A homeowner with a flat spade, a rubber mallet, and a free Saturday afternoon can edge 50 feet of bed cleanly. The jobs that push beyond DIY are more specific than people expect.
Hire a professional when:
- You want poured concrete curbing. The machine that extrudes continuous concrete curbing costs tens of thousands of dollars. There is no DIY version of this job.
- The run is longer than 100 feet and must be perfectly level. Professionals use laser levels and have the experience to maintain consistent grade over long distances.
- The site has significant slope or drainage issues. Edging on a slope without proper grading channels water into the bed or toward the foundation.
- You are installing stone or brick on unstable or clay-heavy soil. A proper compacted gravel base on Calgary clay requires a plate compactor and knowledge of local frost depth.
- The project involves grading or soil removal. Any job that changes the grade around a foundation or affects drainage should involve a professional assessment.
Typical cost ranges
DIY material costs run roughly $1–$3 per foot for metal edging, $0.50–$1.50 for plastic, and $3–$8 per foot for brick or stone (materials only). Professionally installed metal edging typically runs $5–$15 per foot installed, depending on complexity. Poured concrete curbing generally runs $10–$20+ per foot installed, with regional variation. These are general ranges; get local quotes for accurate Calgary pricing.
Questions to ask a contractor
- What is your warranty on installation, and does it cover frost heave?
- How do you handle drainage at low points along the edging run?
- Will you remove and dispose of the existing edging?
- What is your timeline, and do you work around existing irrigation lines?
- Can you show me examples of similar jobs in Calgary’s climate?
Professional bed maintenance covers more than just edging; a good contractor will assess drainage, soil condition, and seasonal prep in the same visit.
What actually works in Calgary yards: a contractor’s perspective
The edging question I hear most often from Calgary homeowners is some version of: “What’s the cheapest thing that won’t embarrass me in three years?” The honest answer is aluminium. Not because it’s glamorous, but because it does exactly what it promises without asking for much in return. Steel is slightly more rigid and suits long straight runs on a formal front yard; aluminium is the better call for anything with a curve or a front bed that gets salt spray off the street.
Poured concrete curbing is the upgrade worth saving for. Once it’s in, you essentially stop thinking about edging. The beds stay defined through snow removal, spring thaw, and everything else Calgary throws at a yard. The upfront cost is real, but so is the time you get back.
The single most common fix on a service call is re-staking metal edging that heaved over winter because it was set too shallow. Four inches deep, backfilled with coarse sand, and staked every 12 inches: that combination holds through Calgary winters better than anything else at the same price point.
Yearlong’s bed maintenance and edging services in Calgary
Calgary yards need edging that can take a beating from freeze-thaw, snow removal equipment, and spring soil movement. Yearlong has handled bed maintenance across Calgary since 2017, and edging is one of the first things assessed on every property visit. Whether you need a fresh aluminium edge installed before the season starts, a full spring cleanup after winter heave, or ongoing bed maintenance to keep borders sharp through the growing season, Yearlong’s team brings the local knowledge and equipment to do it right.

Yearlong also coordinates poured concrete curbing referrals for homeowners ready to make the permanent upgrade, and pairs edging work with seasonal cleanup services so your beds are tidy from the first thaw to the last frost. No long-term contracts required. Get a quote for your Calgary property at Yearlong.
Sources
- How to choose the right landscape edging
- The 8 Best Landscape Edging The Spruce Has Tested
- Get to know your edging options
- Best Edging for Flower Beds: Budget to Premium
- Permaloc: Best landscaping edging material options
- Flower Bed Edging Ideas: 12 Materials Compared (2026) – D and G Flooring
One Response